Setup guide
Overview
Use this guide to configure Minecraft for the server. It is broken into two sections. The first one covers installing the proper version of Minecraft, and then the second part covers adding and connecting to the server. You should only need to do this once.
Part 1: Minecraft version
Minecraft updates frequently, and it is unsustainable for me to update the server to the latest version continually, so this guide will walk you through installing an older version of Minecraft (1.21.10) for the server and, importantly, how to revert to the current version.
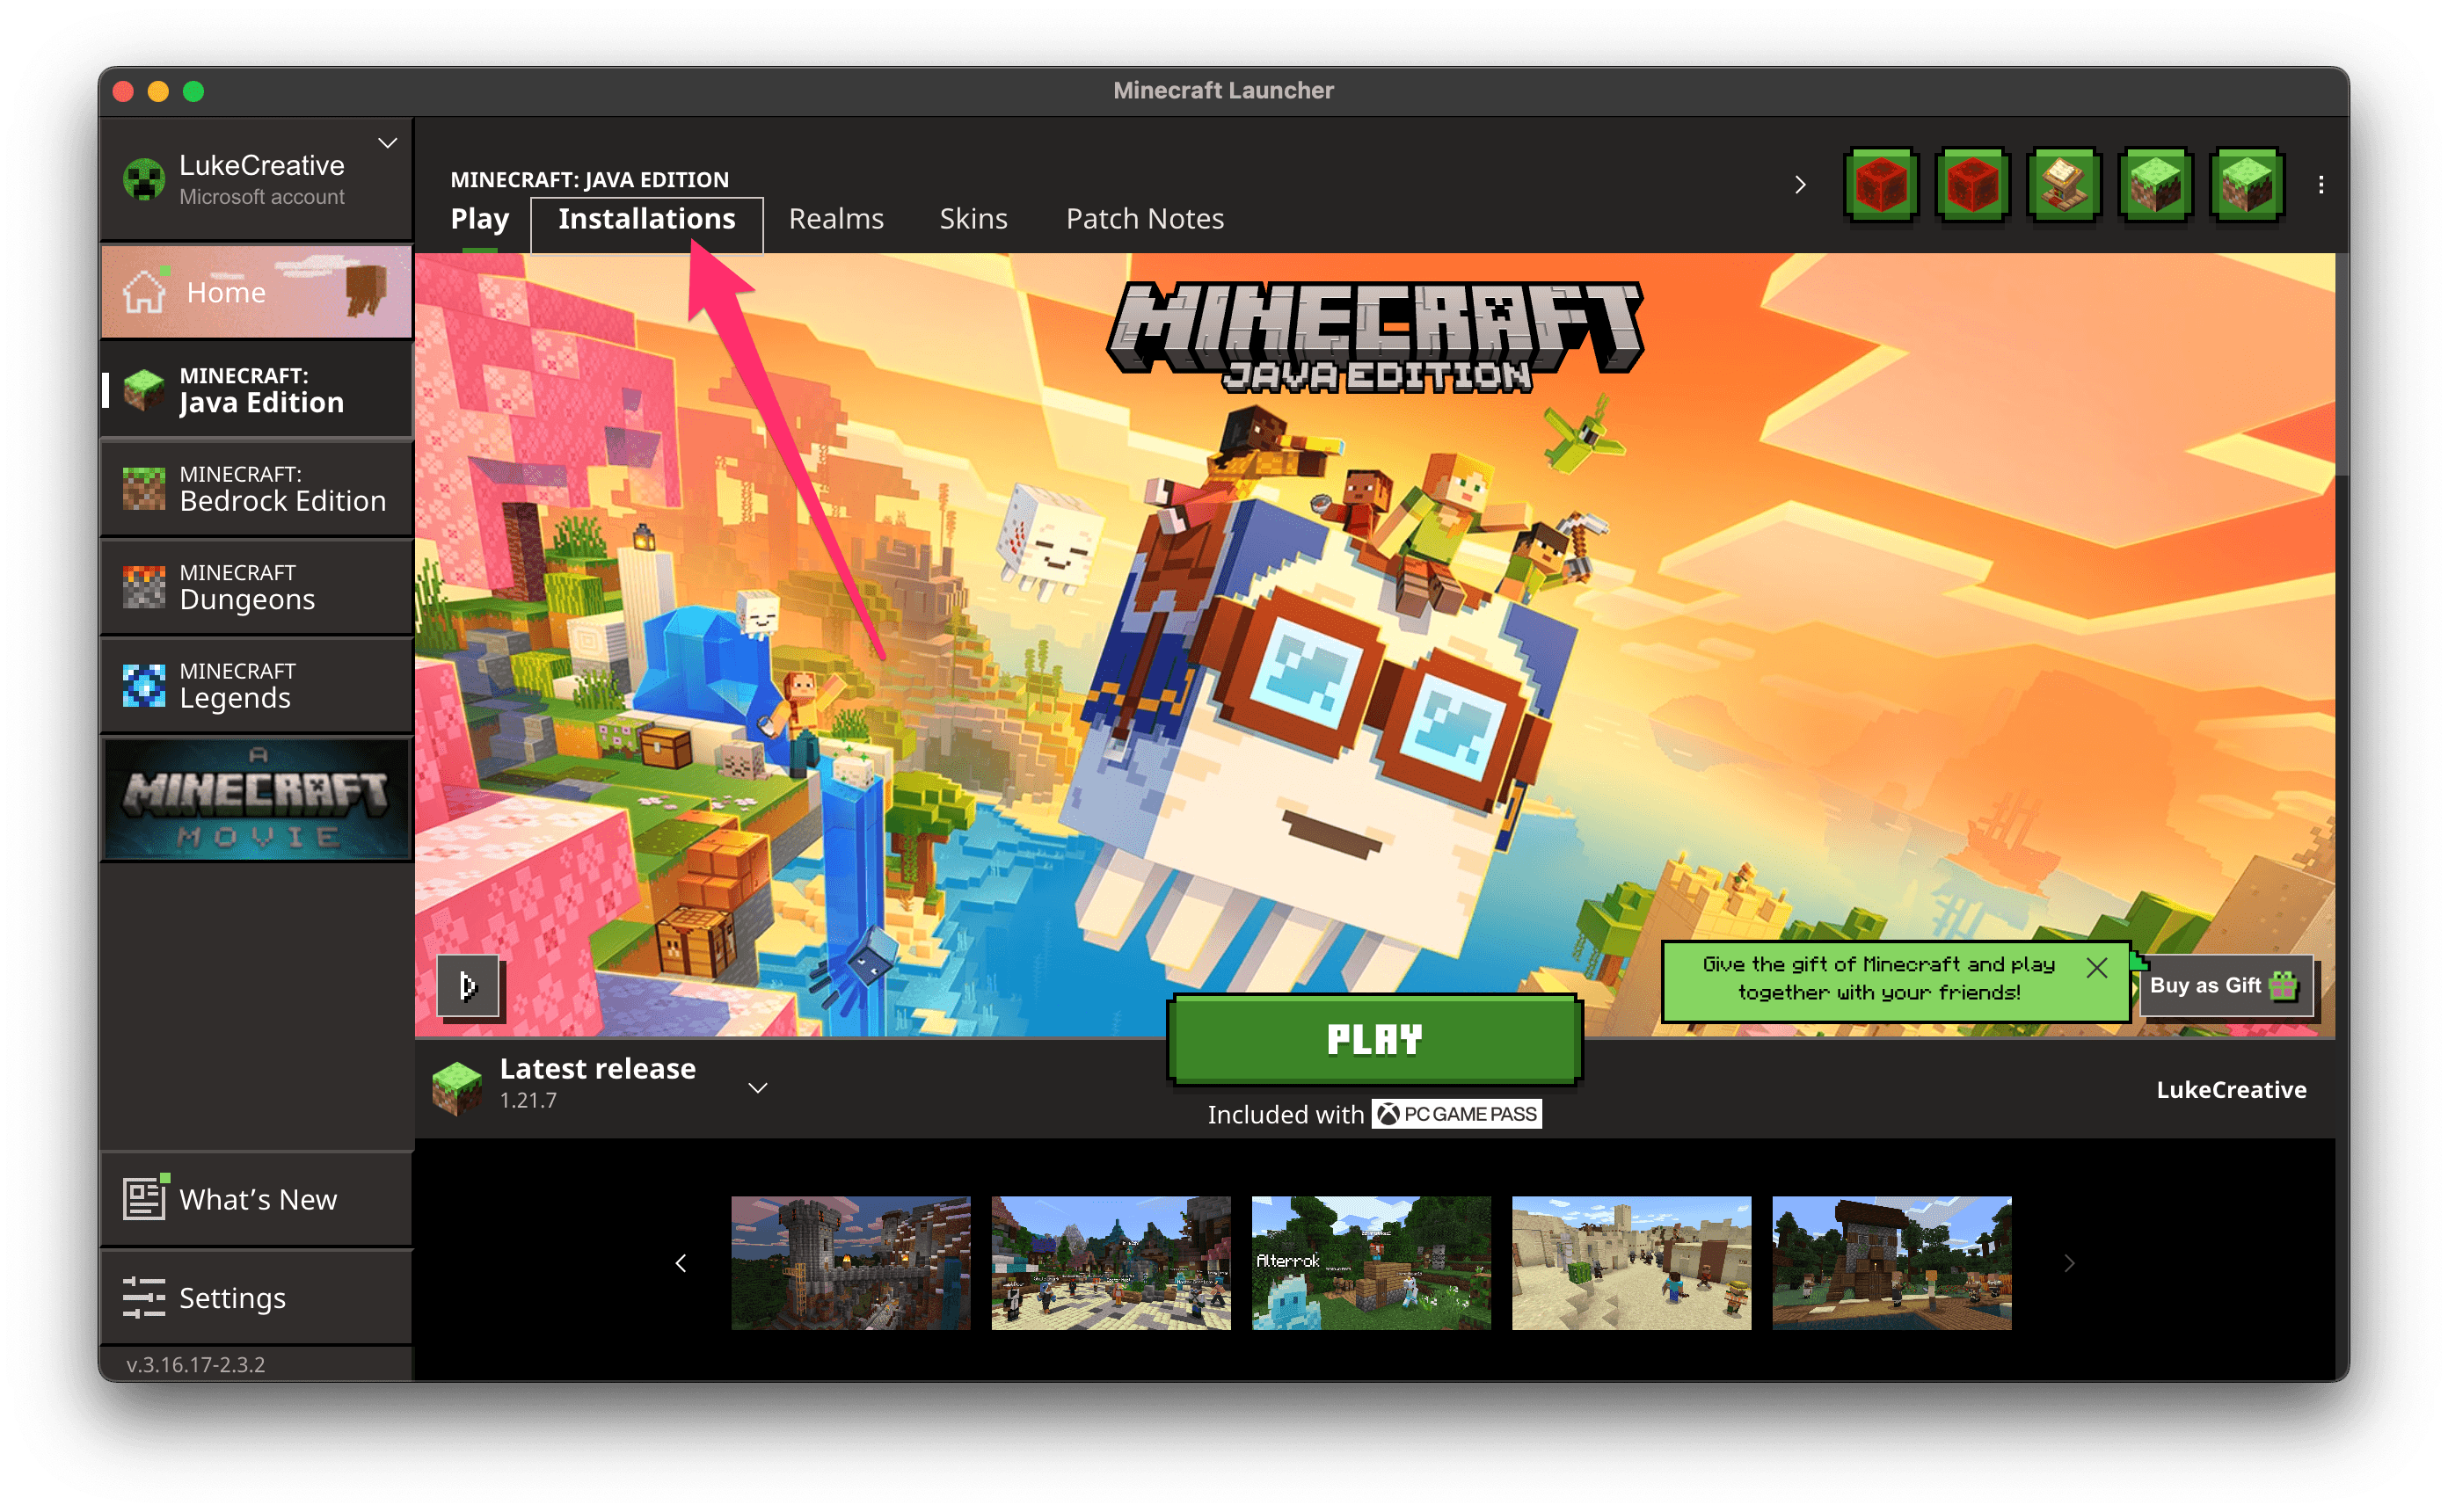
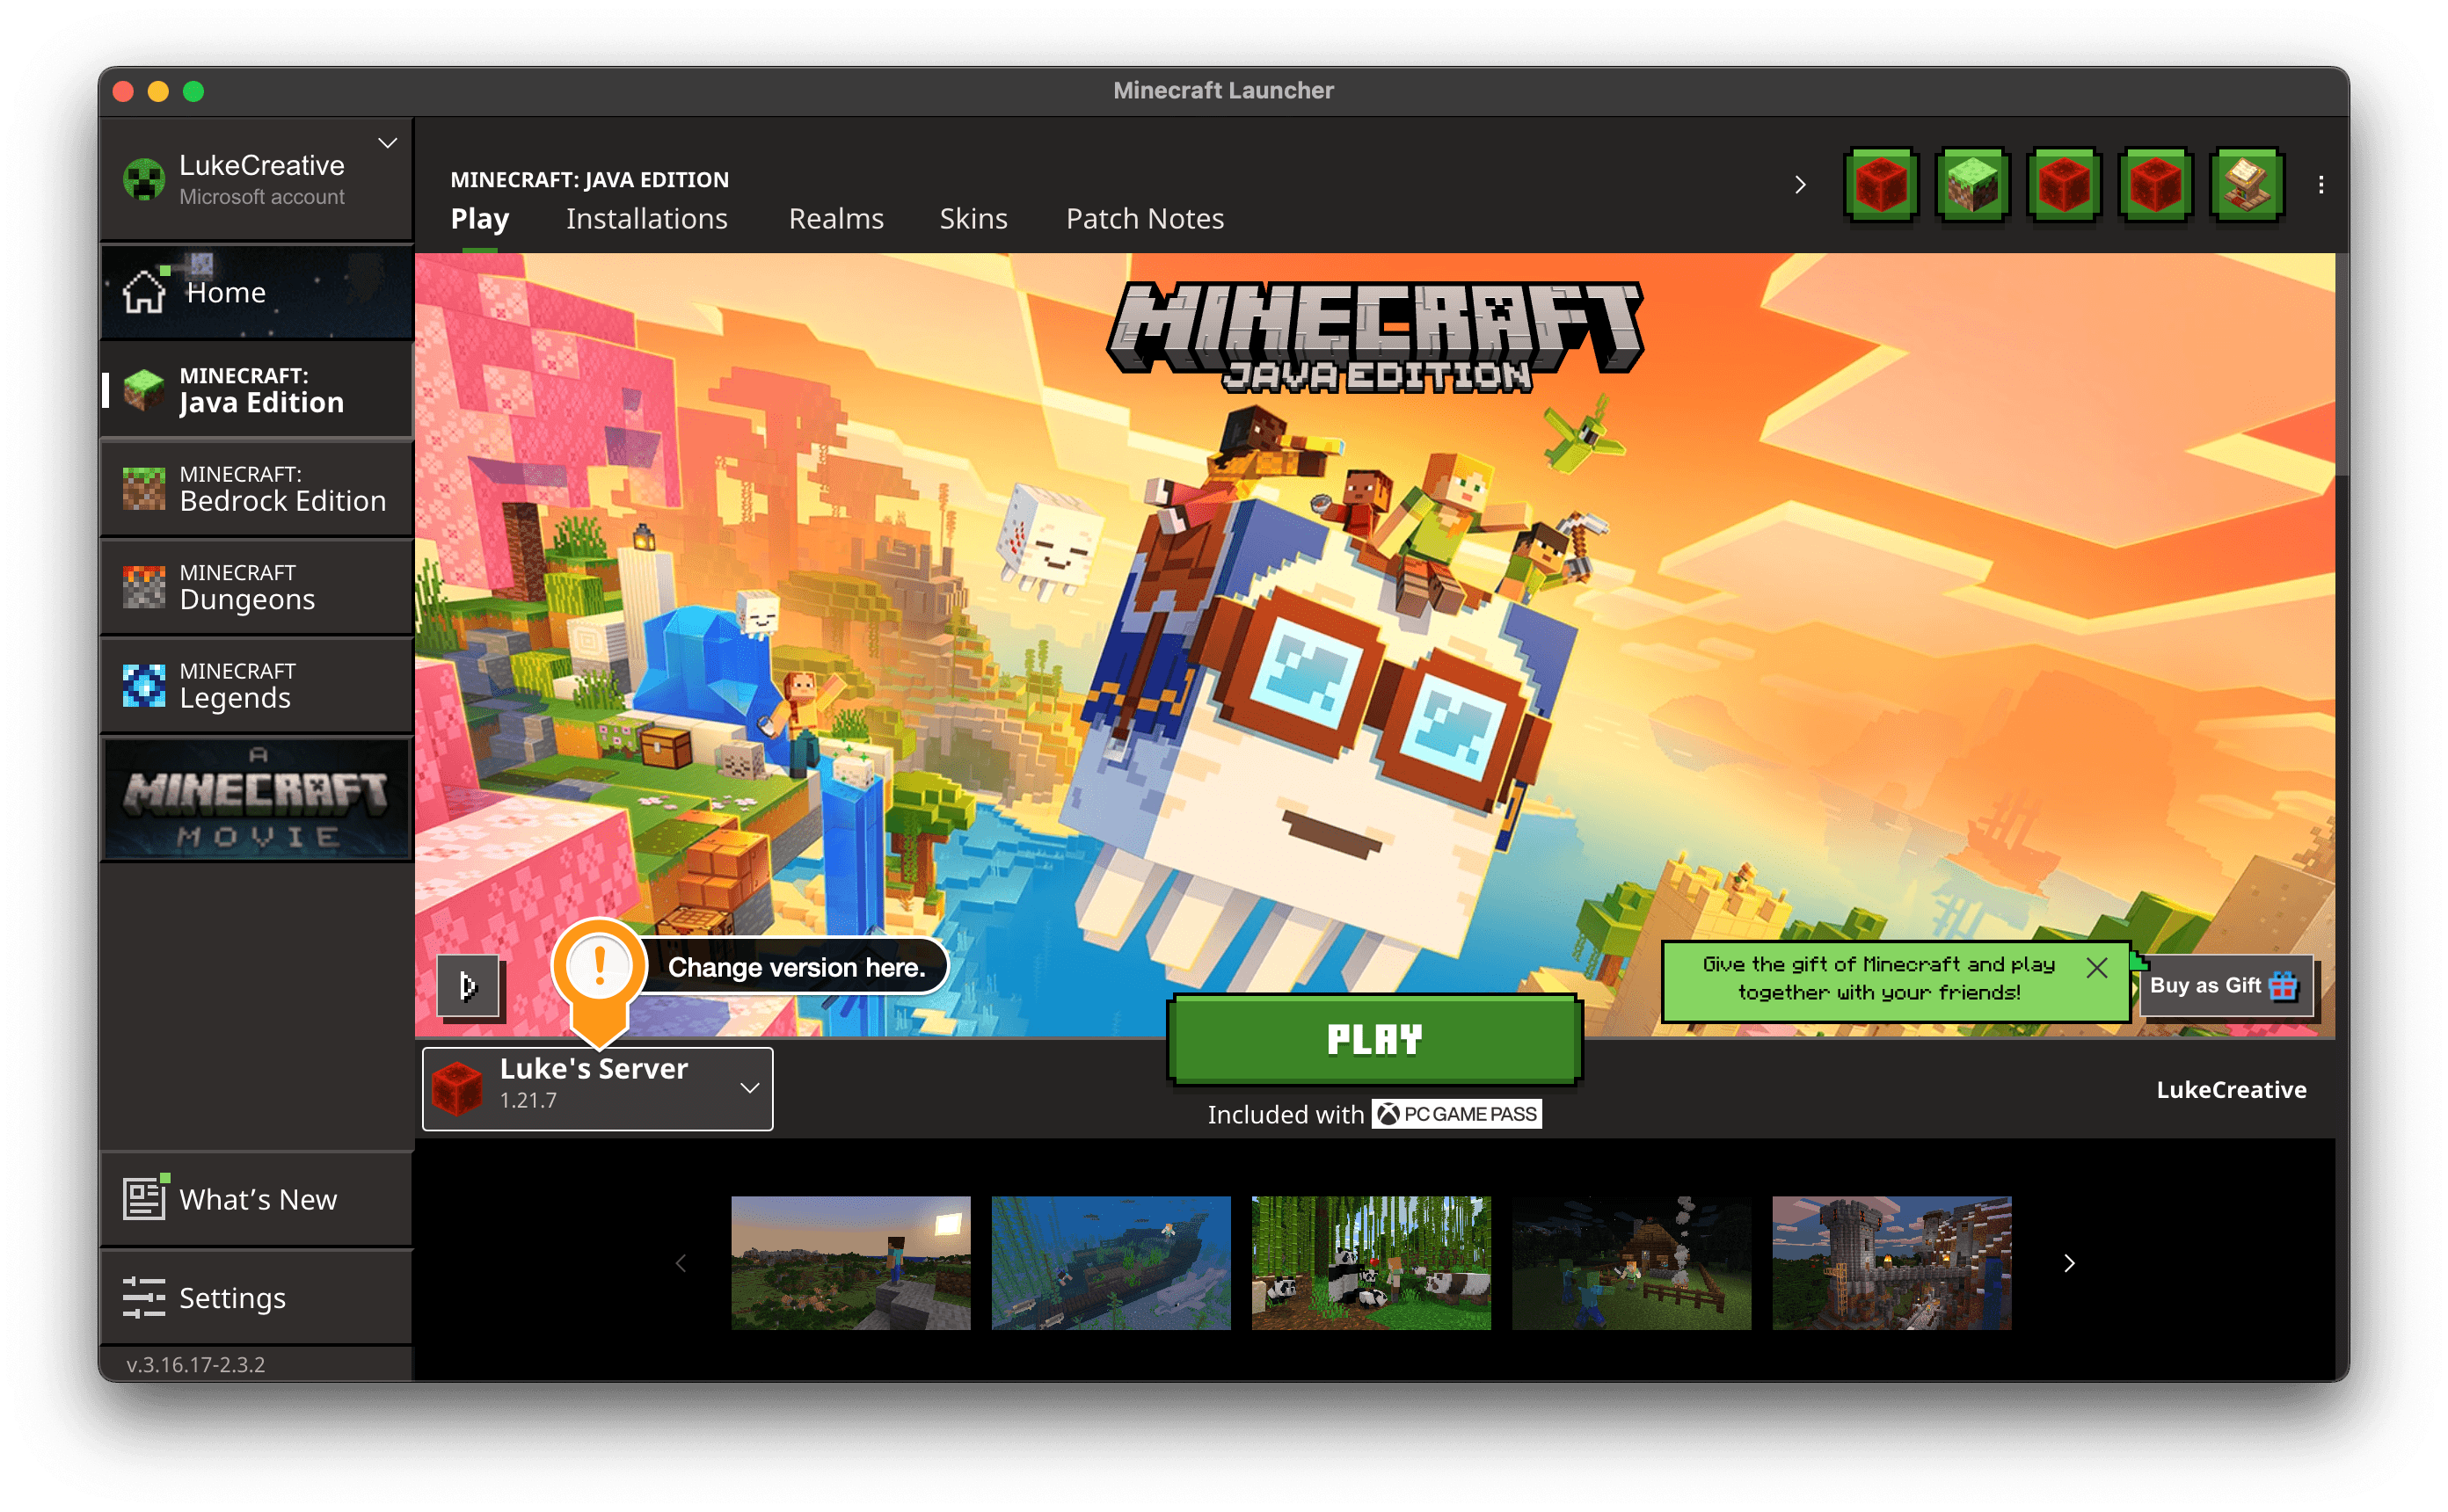
Open Minecraft; you will be greeted with the Minecraft Launcher screen, but do not click the big green "PLAY" button yet.
Click the "Installations" tab towards the top of the screen. Installations allow you to have multiple versions of the game, which you can easily switch between.
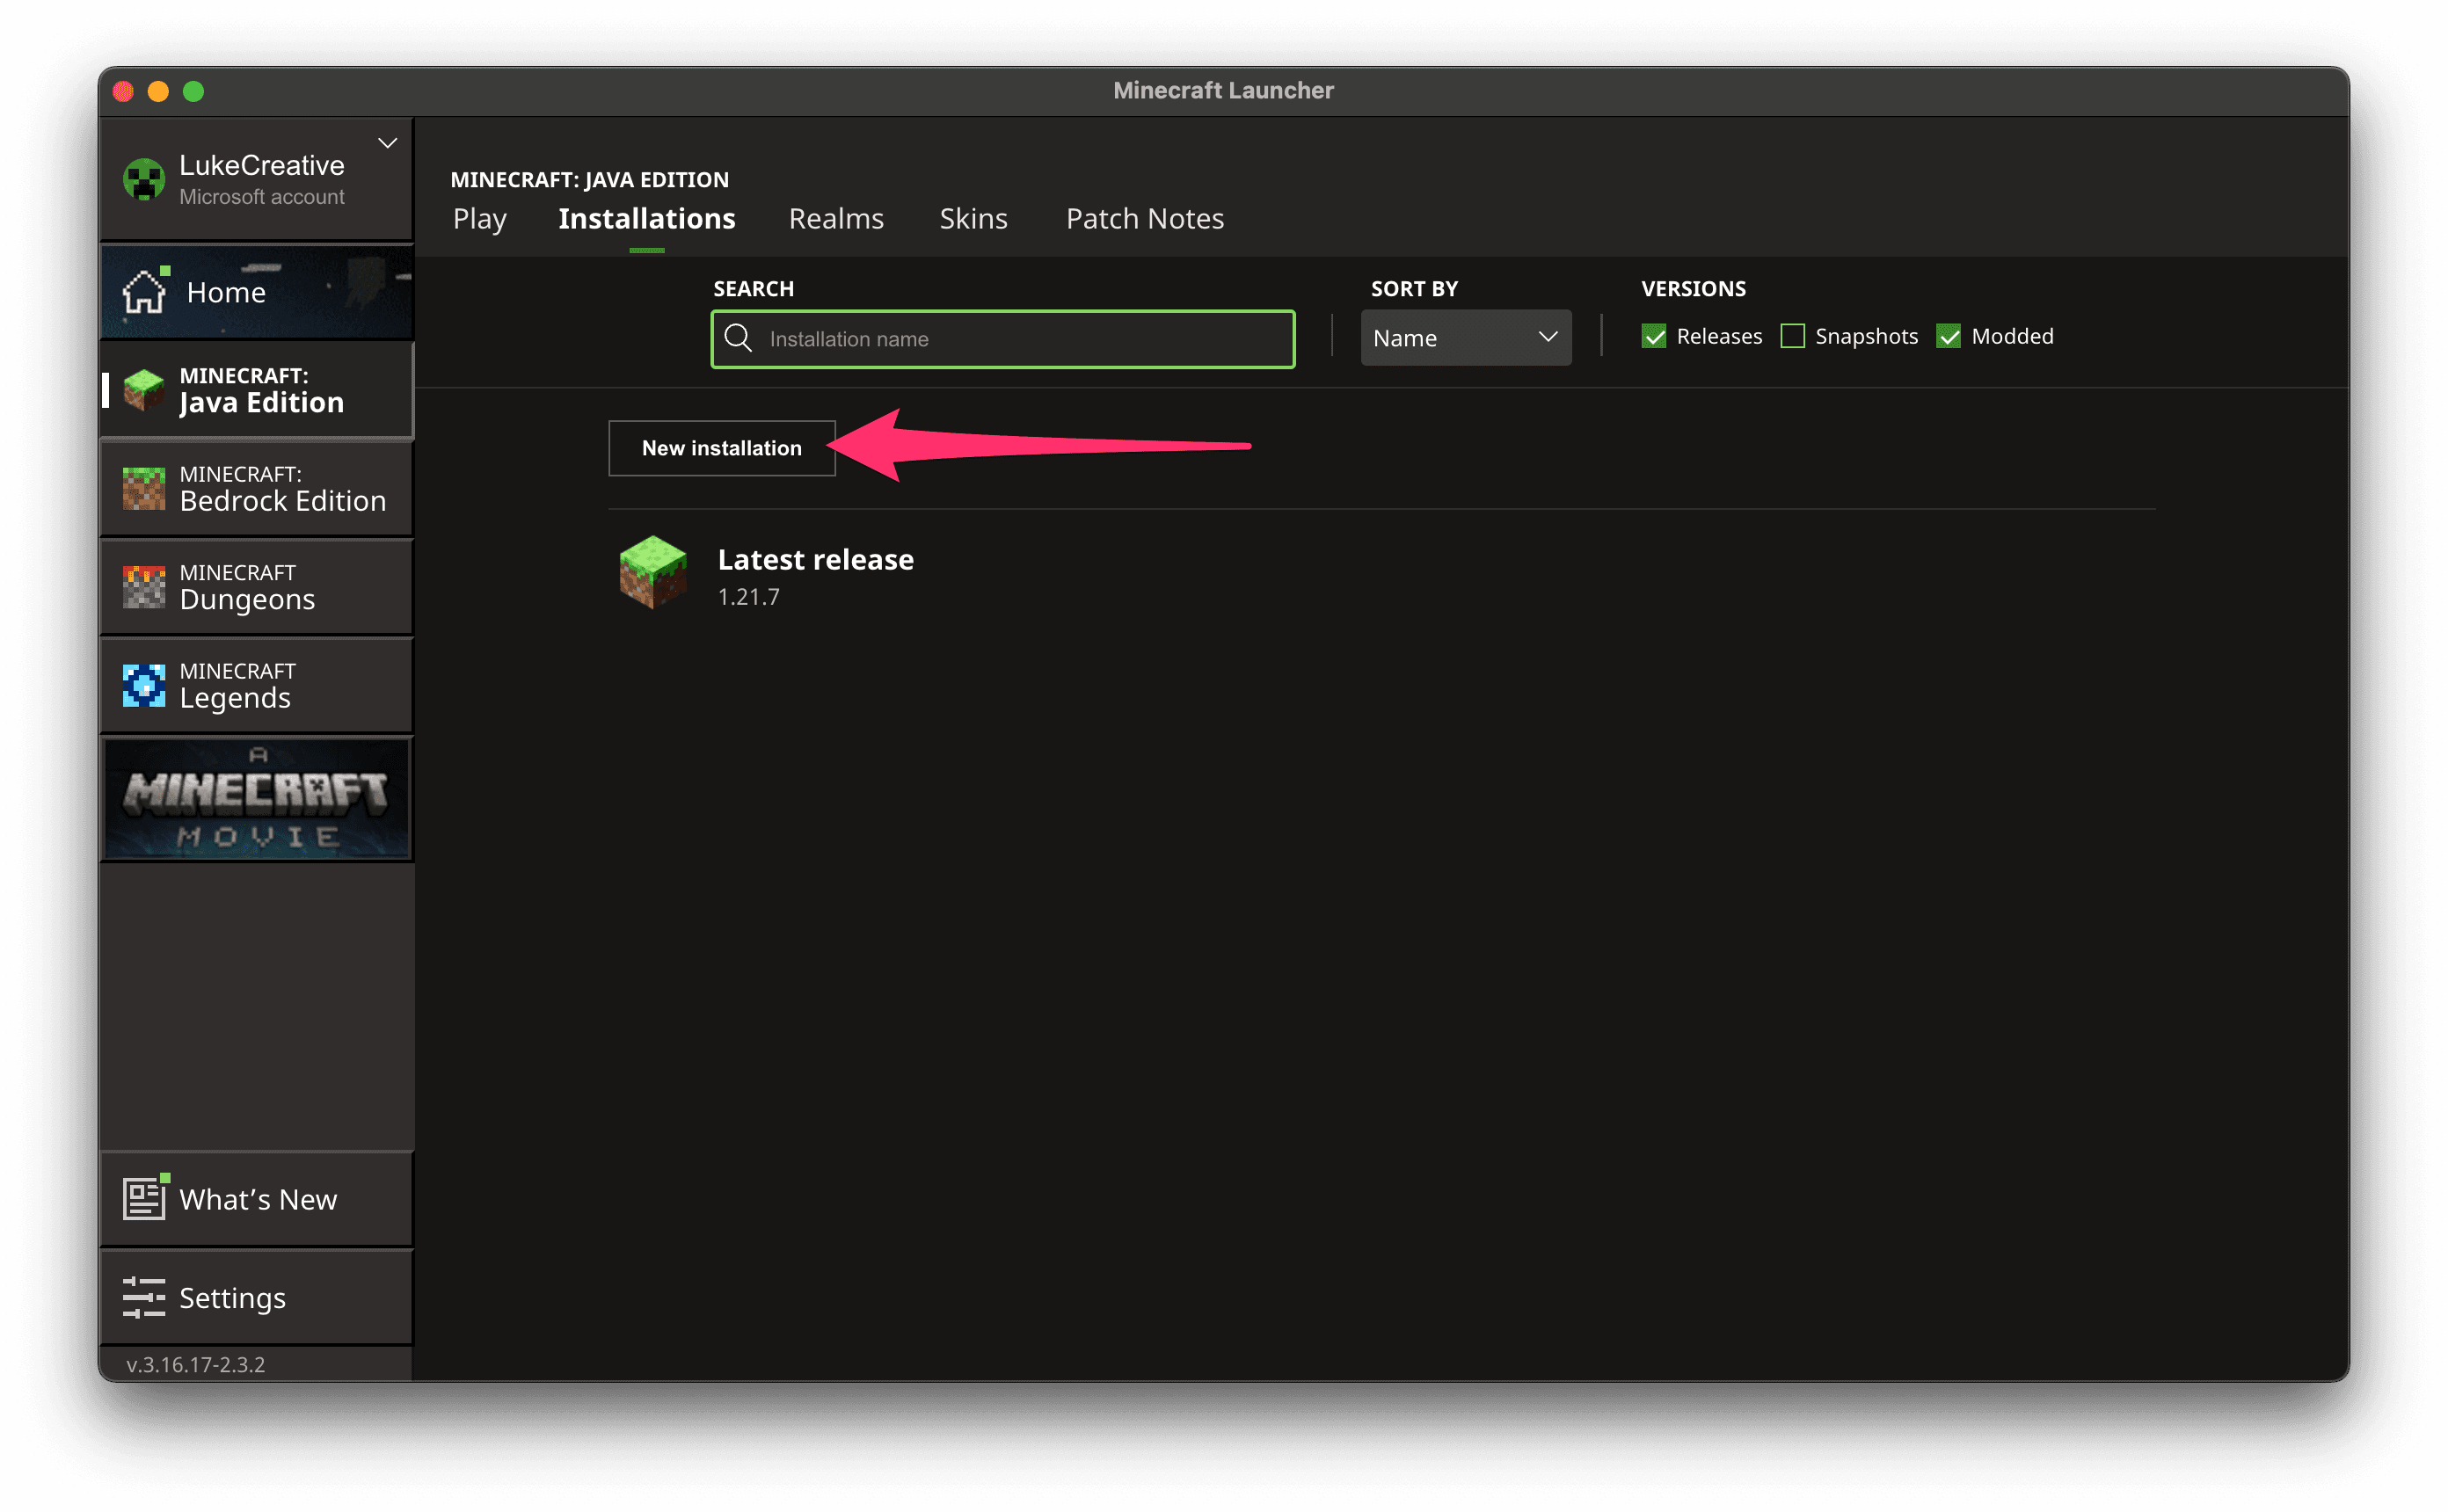
- On the "Installations" screen, you should already see a "Latest release" version, but let's add another for this server. Click the "New installation" button just under the search bar.
- In the "Create new installation" dialog, enter a name such as "Luke's Server" and select the "release 1.21.10" option from the "Version" dropdown menu. Ensure the option does not display "Latest release," as this version will always adhere to the latest version of Minecraft. You can leave the remaining options unchanged. I like to set the icon (at the top) to something memorable, such as a Redstone Block, so I can easily come back to it. Once you are done, click the "Install" button at the bottom of the dialog to download and install the version of Minecraft that the server is running.
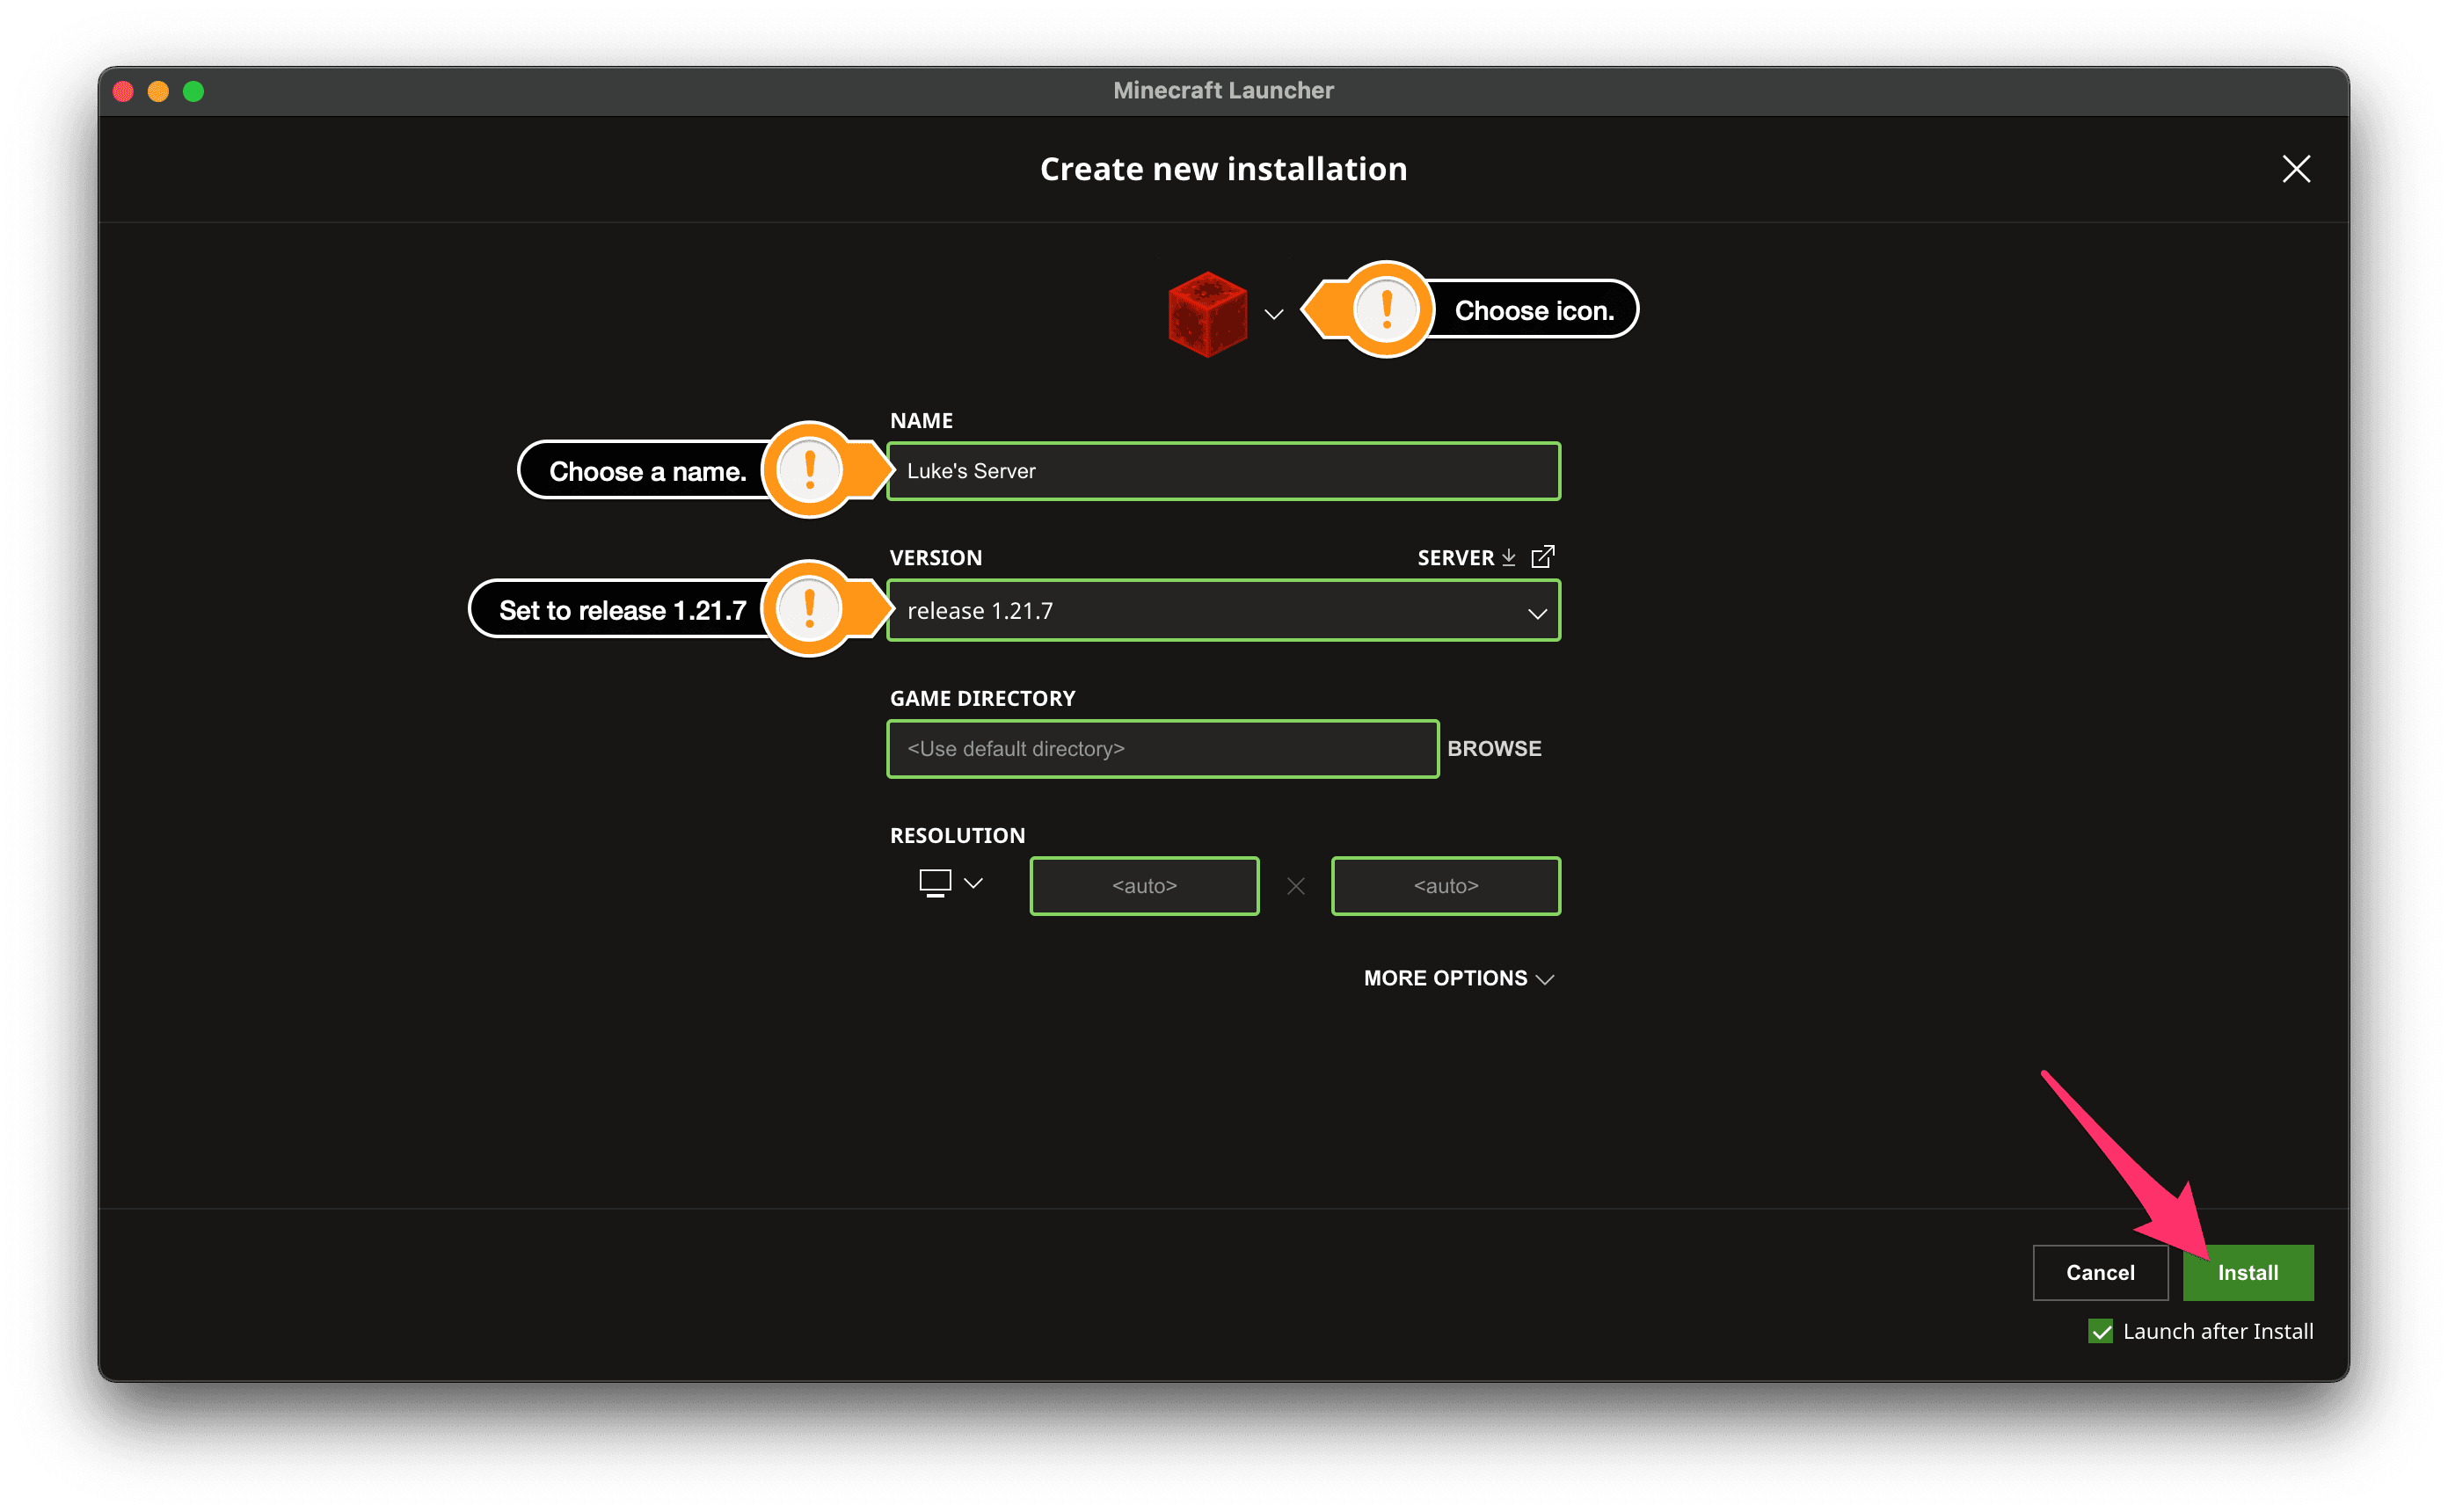
- Once the installation is complete, the game should launch automatically.
If you want to return to other versions for single-player, you can switch back to different versions by selecting the "Latest release" option from the dropdown on the launcher homepage.
Part 2: Adding and connecting to the server
Now that you have the correct version of Minecraft installed, you can create a bookmark for the server, making it easy to join in the future.
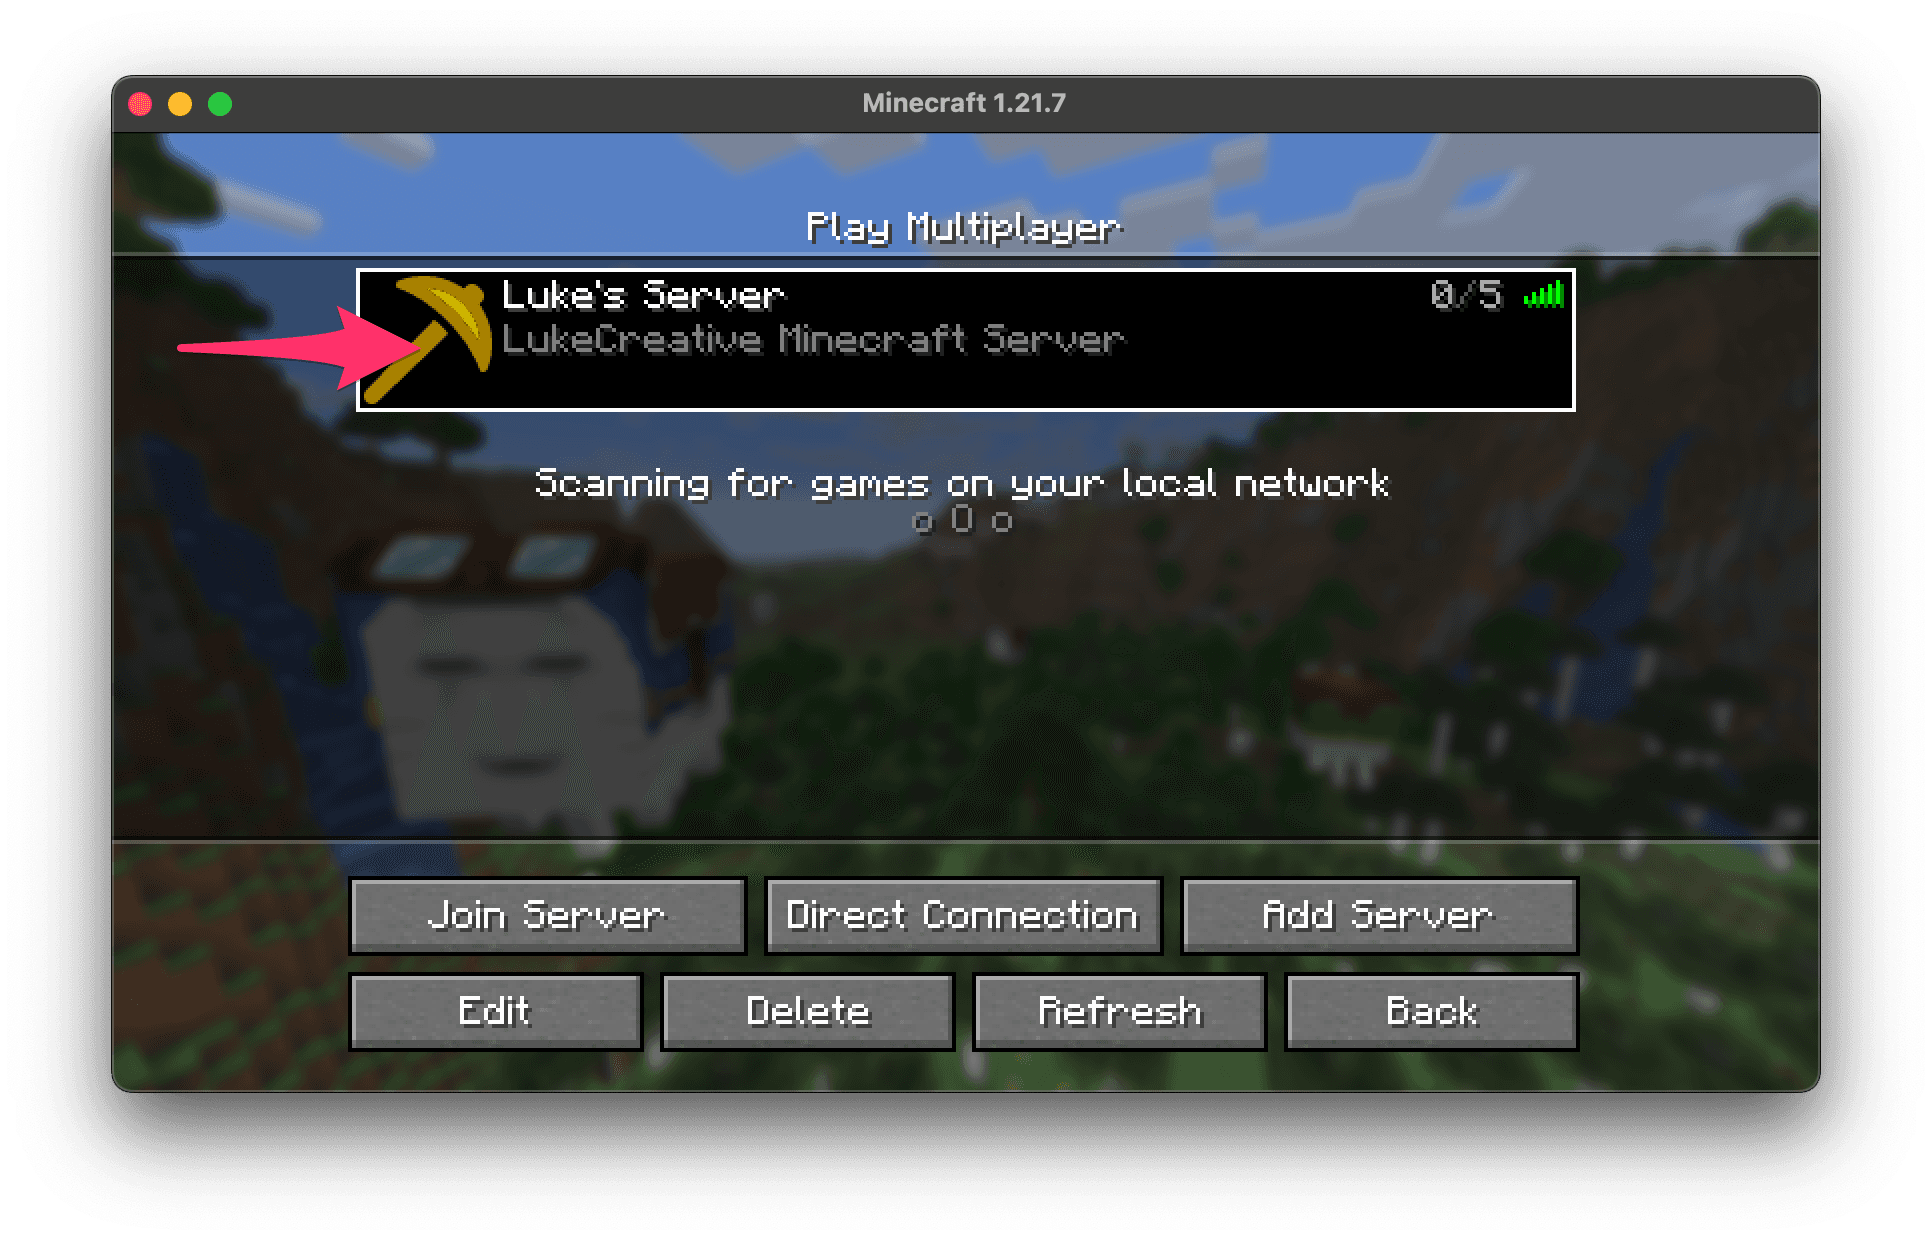
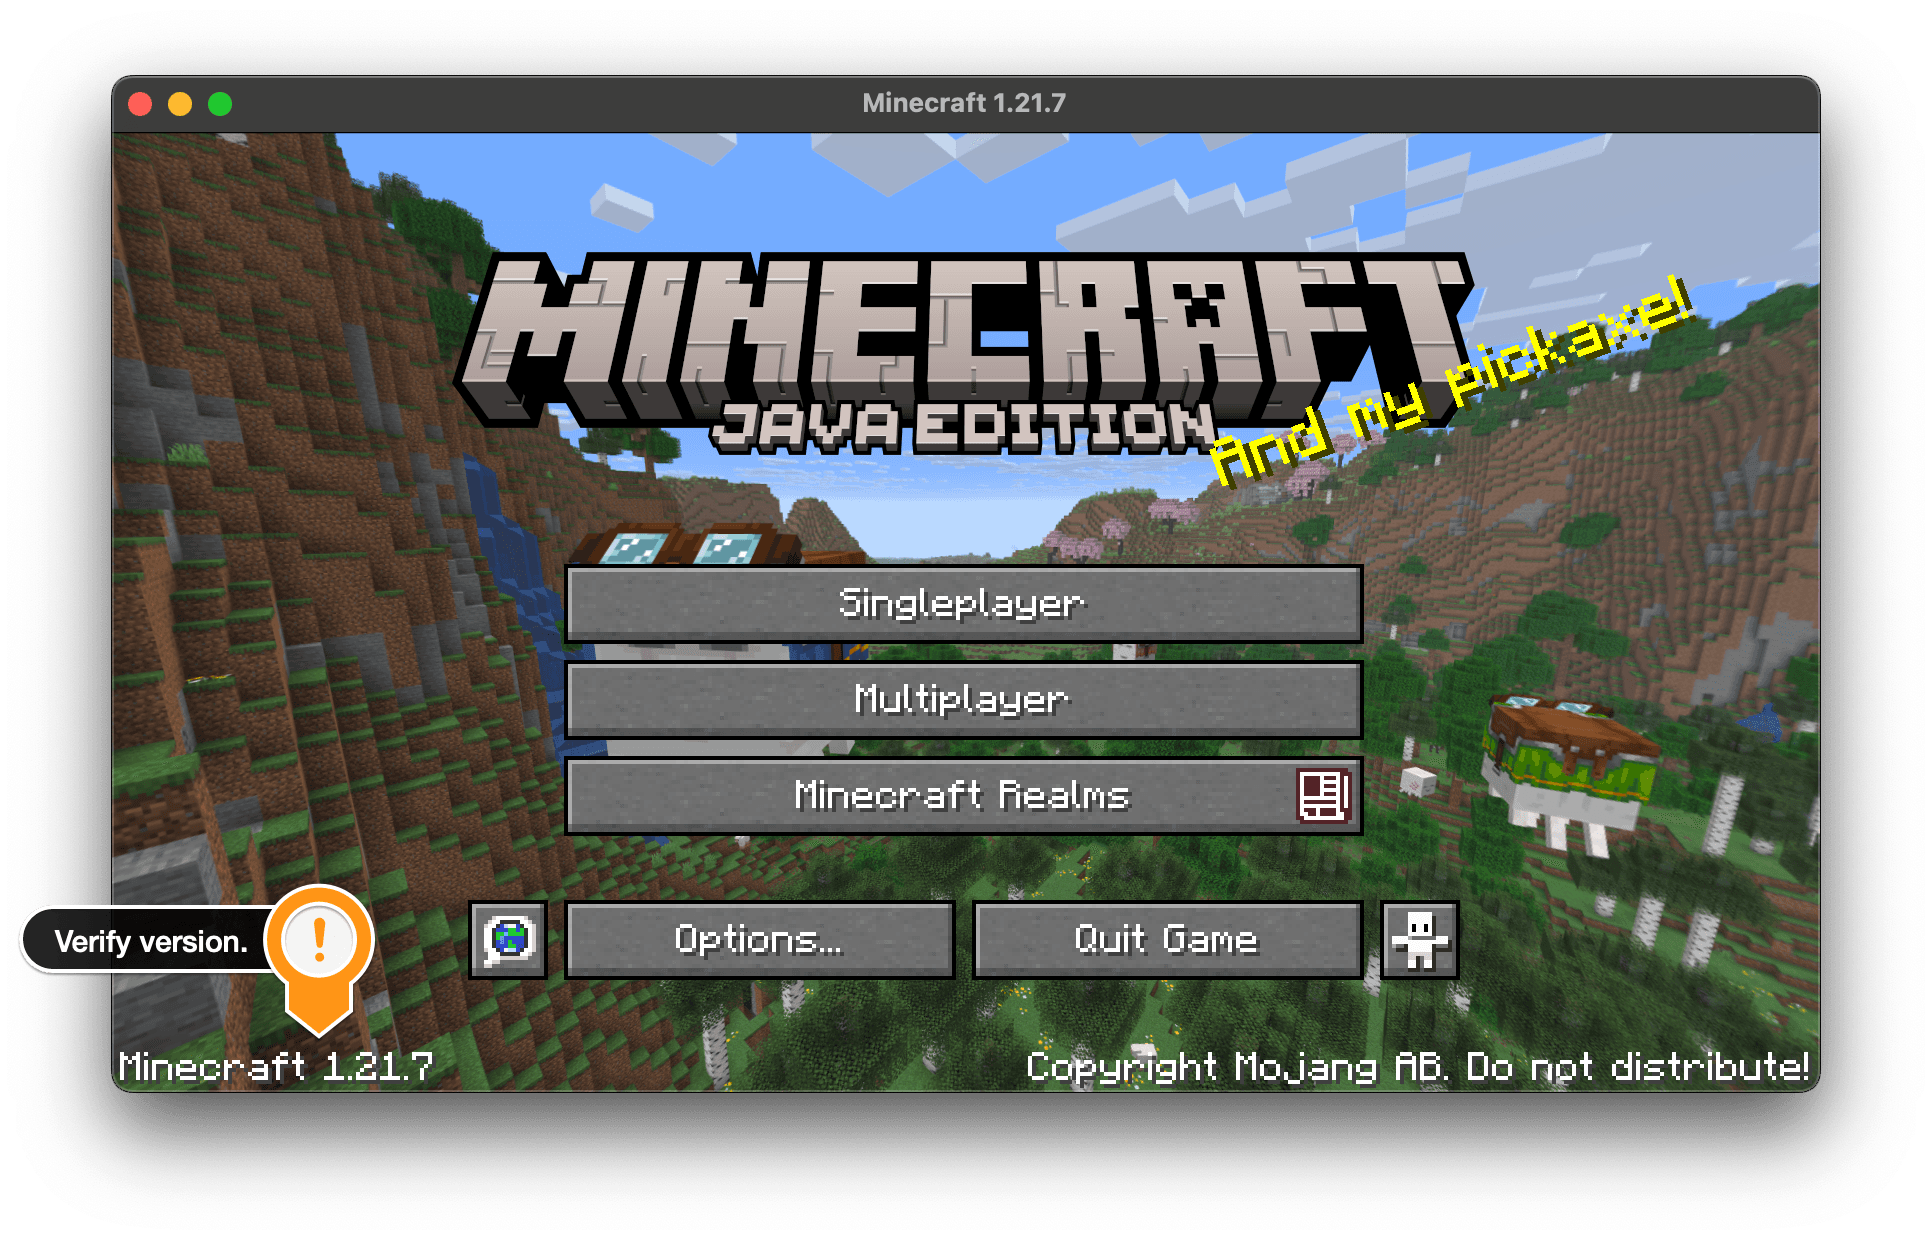
- Once Minecraft has loaded, you should be at the main menu. In the lower-left corner, confirm the version matches 1.21.10.
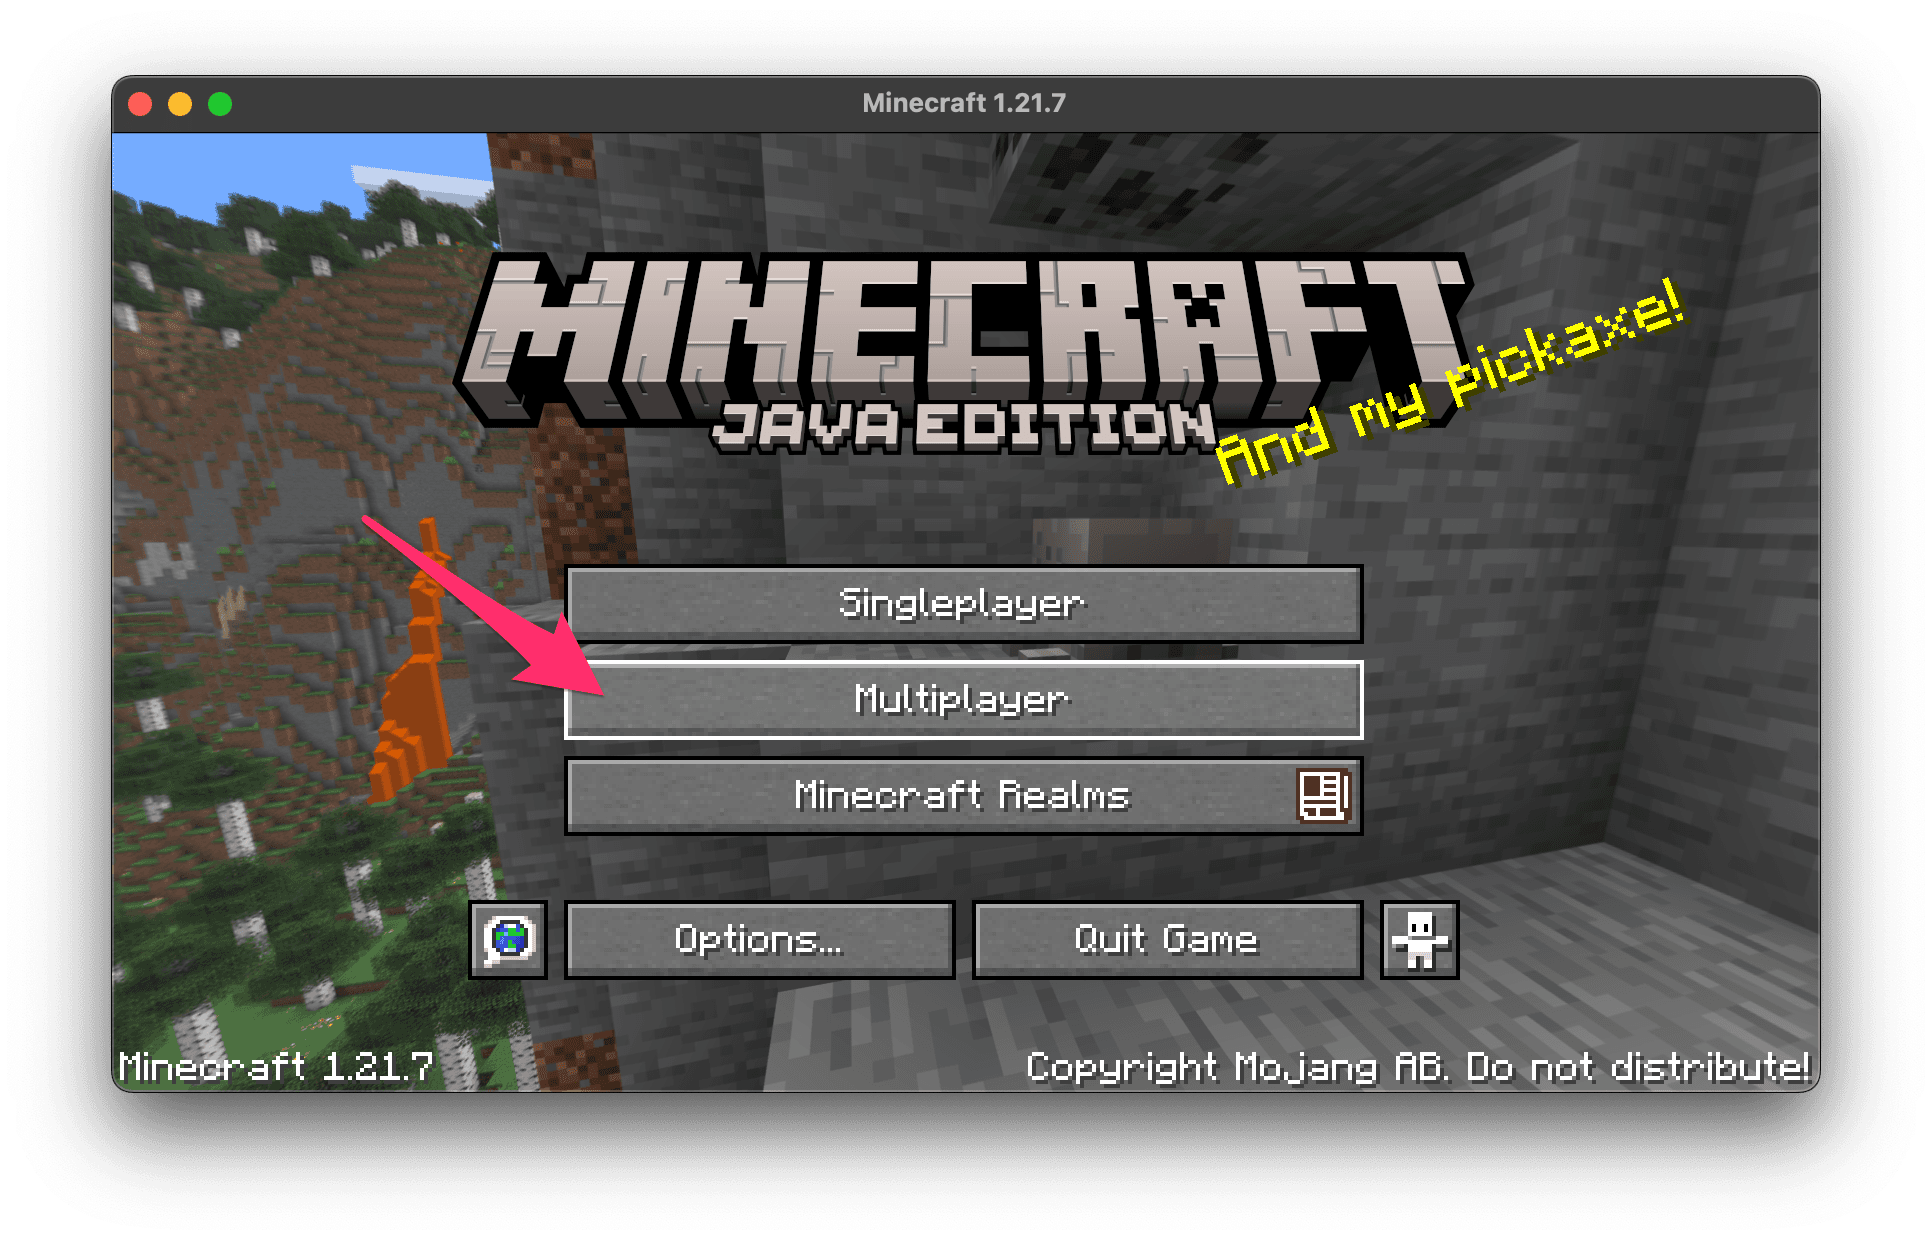
- Click the "Multiplayer" button in the main menu to open a screen where you can see a list of servers you have added.
- Click the "Add Server" button.
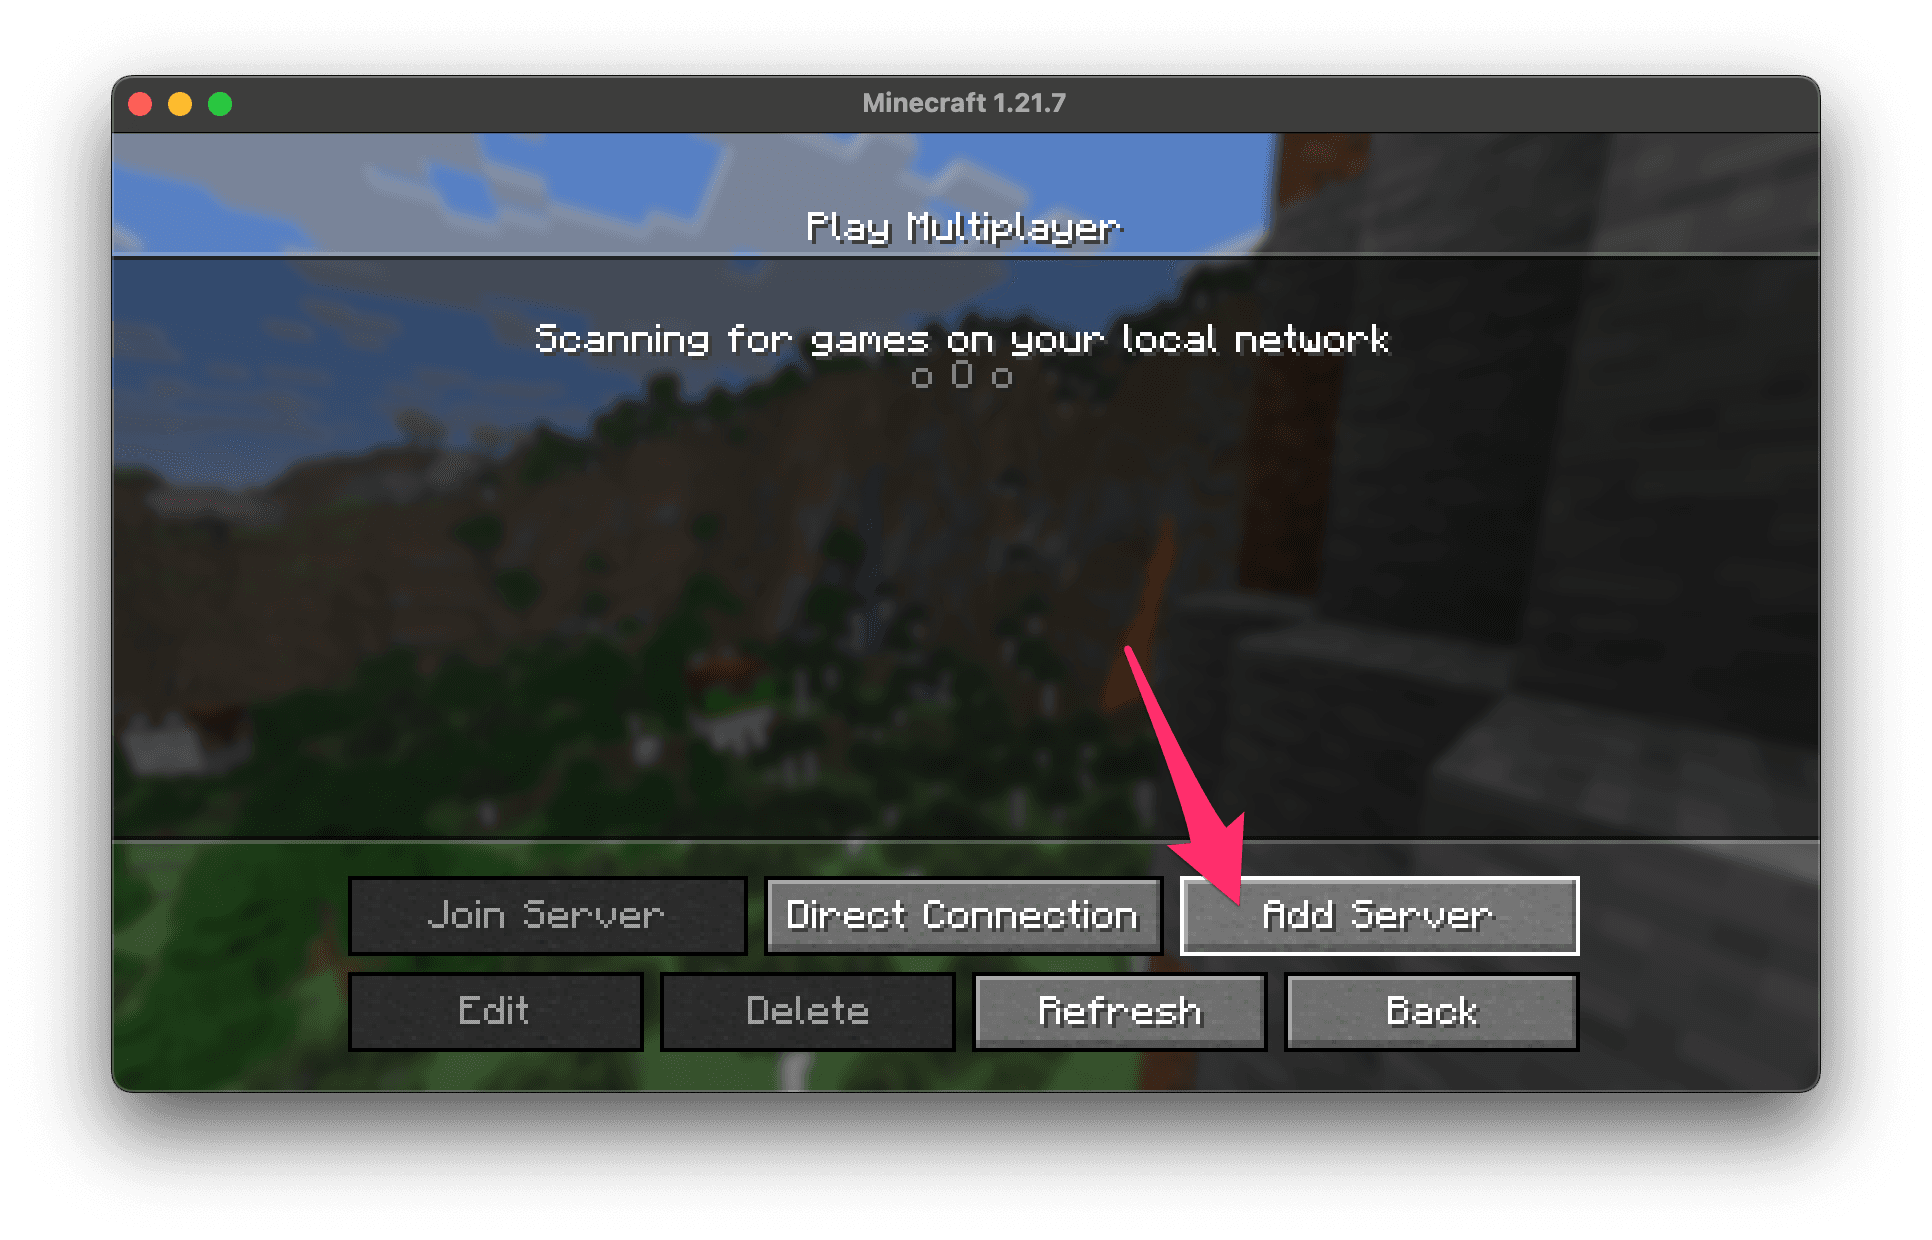
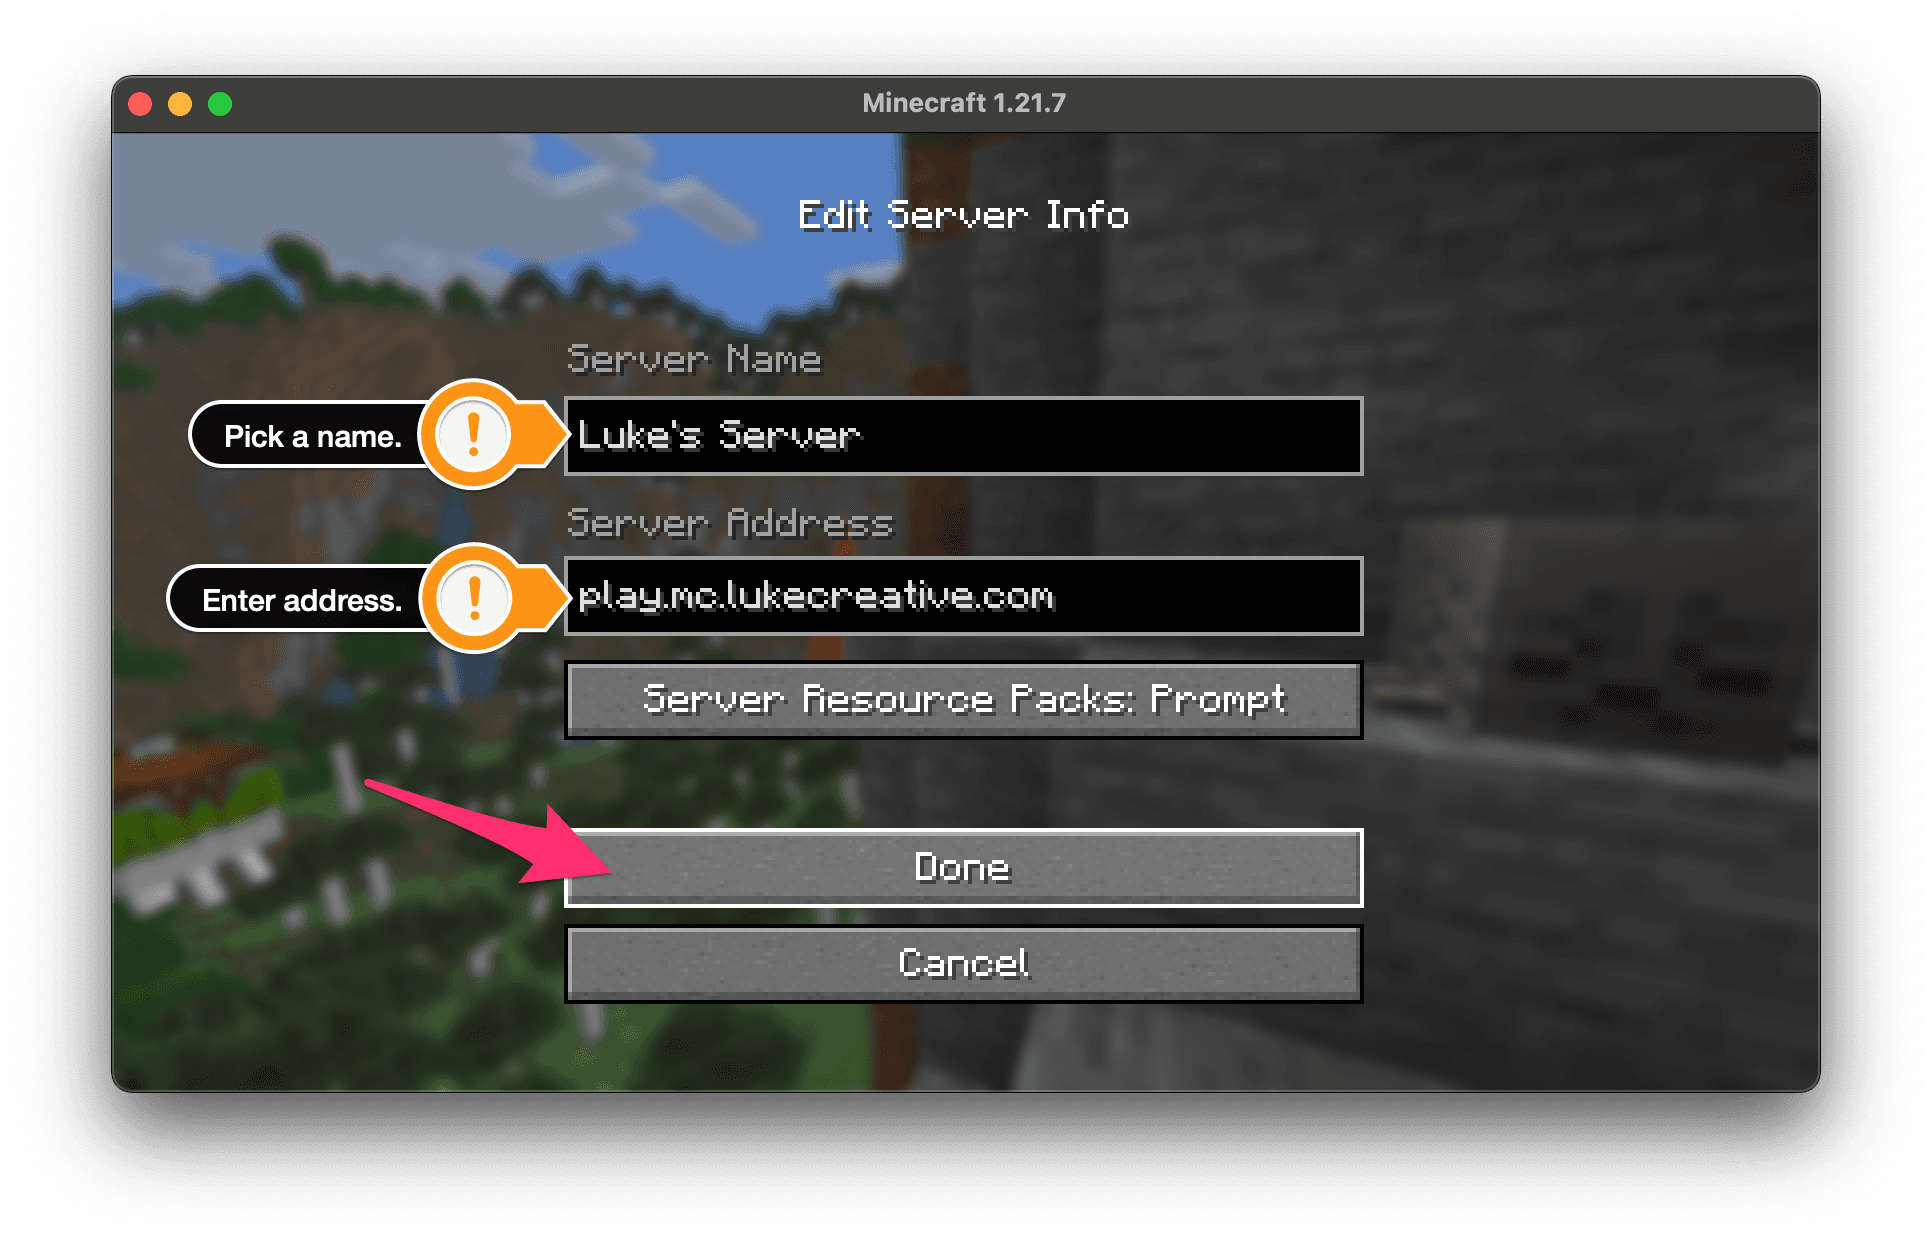
- In the "Add Server" dialog, give the server a name like "Luke's Server" and enter the server address: play.mc.lukecreative.com. Click the "Done" button to save the server.
- You should now see the server listed in the servers section. Click on it to select it, then click the "Join Server" button to connect to the server.